In August 2019, Facebook introduced the Spark AR toolkit to the public, allowing anyone with Photoshop skills and time to learn to easily create their own Instagram filters and filters. If you want to learn how to create Instagram filters using Spark AR Studio then this article will be for you.
Create Instagram filters using Spark AR Studio
Preparation requirements:
– Download and install Spark AR Studio on computer:
=> Link ![]()
=> Link ![]()
Create Instagram filters with Spark AR Studio
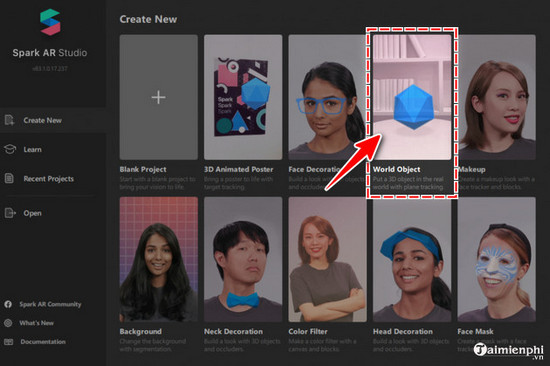
Step 1: Choose Instagram Effect
Open Spark AR Studio software, at the Create New screen you have 2 options:
+ Blank Project: Create a completely new filter
+ Template templates: Create filters based on available templates
In our example, Taimienphi chooses to use a template, the Word Object.
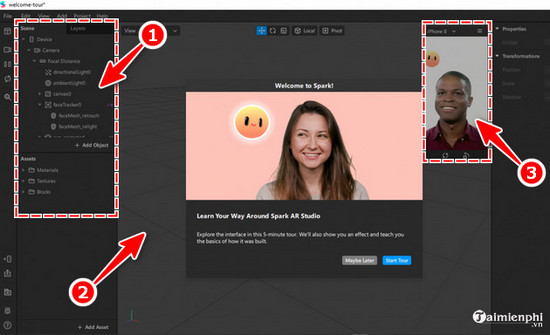
Step 2: Get used to the interface
The working screen of Spark AR Studio is divided into 3 main areas:
Viewport: The center panel is in the middle of the screen, where you build filters.
– Simulator: Located in the right corner, whose function is the preview screen.
– Scene: The panel in the left corner of the screen, where the editing options are located.
Step 3: Upload 3D assets
Click File and select Import AR Library.
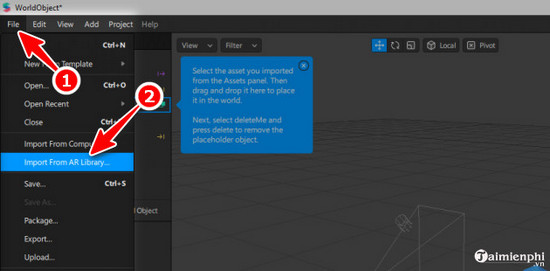
A new window will appear with many options on the left, click on 3D Object then select the desired object .
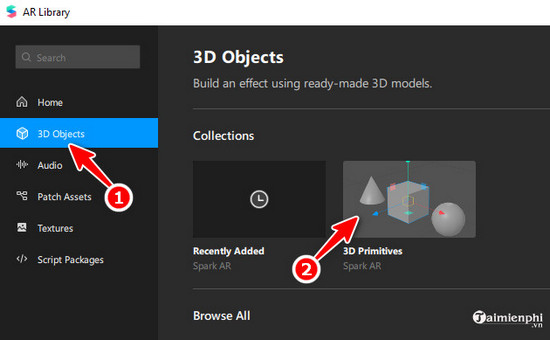
To find more Object templates, you can sign up for a Sketchfab account and use
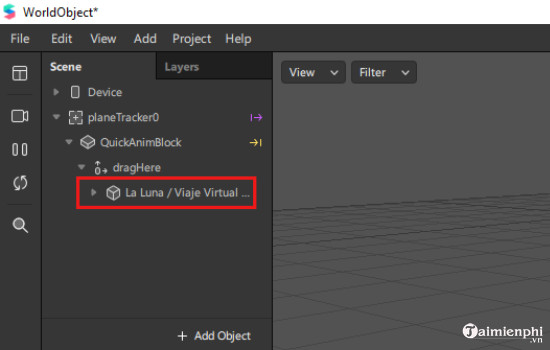
Step 4: Add effects
From the Scene panel on the left, users can freely edit:
– Change the light source to give the 3D object more depth.
– Choose whether the effect is available from the front camera, rear camera, or both.
– Change the animation for the uploaded 3D object.
– Add more effects such as animations, textures and additional materials.
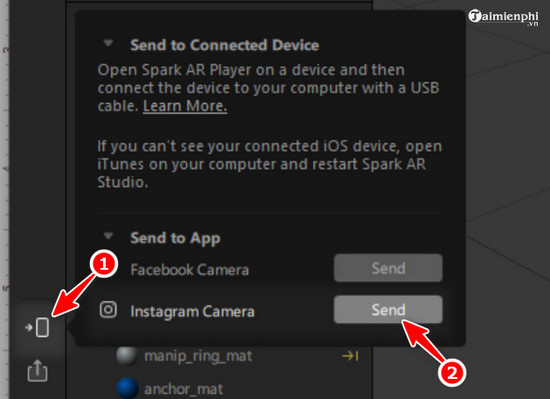
Step 5: Test the effect
Once you have created the Instagram Filter, tap the phone icon in the menu on the left side of the screen and select Insgram Camera to preview how the filter just created.
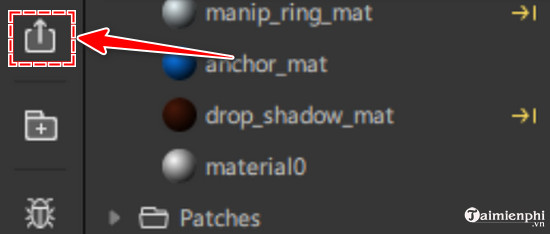
Step 6: Publish Instagram Filter
Once you have completed the Instagram Filter, press the Upload button in the left corner of the screen.
The filter will be reviewed by the publisher before being officially available on Instagram, which can take from 1.2 days up to 2 weeks.
You can also use filters on Google Meet on your phone or computer, allowing you to change a beautiful picture instead of your face. How to use as instructed in the article here.
https://thuthuat.taimienphi.vn/cach-tao-filter-instagram-60320n.aspx
By creating Instagram filters just introduced by Taimienphi, users can unleash their own beautiful filters and share them with other Instagram users. In addition to learning how to create Instagram effects, you can also refer to